Wednesday 8 April 2015

Prosumer gear

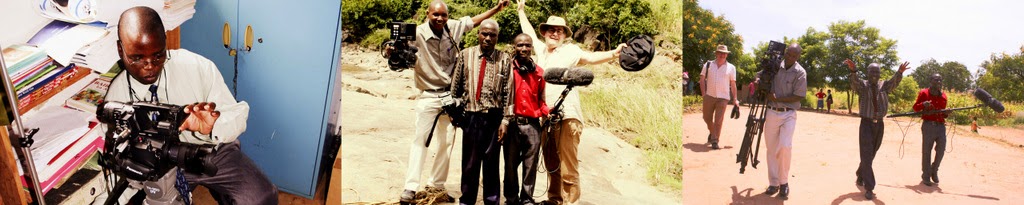
As well as the tablet kit for our project in Malawit, we brought a high-end set of gear to work with and to compare in how it's used. It was basically Rick Goldsmith's core film-making kit at the moment (built around a decent camcorder) and supplemented with some of my Open University gear.  It's just possible to film solo with this setup, but that's not really the point - it allows a crew to work together to capture high quality sound and video, with a lot of control over the recording settings.


The kit, consists of:
  • Panasonic AF101
  • Lenses (a decent zoom and some fast primes)
  • Monitor
  • Tripod
  • Shotgun Mic
  • Rode windshield suspension kit
  • Headphones
  • Boom pole.
  • Projection gear
  • Large reflector
  • LED light and stand
Mac laptop set up as an edit deck with 
  • Final Cut Pro 7
  • iMovie

Although our participants needed quite a lot of hands-on support to get going with this setup, it's not quite true that it's harder to use for newcomers to film-making.  Most people can pick up an ipad and start shooting and get something straight away. But once the idea that the idea of control over the camera to get an intentional shot is introduced then it's a less straight-forward comparison.  Having a large, robust rig with more physical controls provides a good opportunity to work with things like focus, exposure and white balance, which even if they're available on smaller devices are often hidden behind touchscreen menu options.  In a sense the equipment itself motivates a more considered approach to shooting and with enthusiasm and appropriate support it can work very well for a group.  It also encourages teamworking, with space for several people collaborate in getting a shot.


The advantages:
  • It's a large, robust setup that enables collaborative film-making.  It works well with groups up to 10 or so if some are being interviewed while others are crewing.
  • The video monitor and headphones help pick up recording issues on the shoot and correct for them, while high recording quality (ie definition and codecs) keep options open in the edit.  We felt this was important for a project which is producing advocacy material for international use.
  • Setting up shots gave our group a lot of time to discuss the content of interviews and coach on and negotiate about what was going to be said next.
  • Options like different lenses, reflectors and lighting and  
  • Several of the teachers we were working with took very naturally to working with this kit, and they could easily form the nucleus of a film-making team in the future.
Issues we've run into
  • The gear is expensive and we couldn't get it insured to be loaned out in the way that the ipad based kits were.
  • Weight - moving all this kit around locally and internationally is a serious undertaking.
  • Shots take time, which means that there needs to be a lot of time available, or that production planning needs to be tight.
  • The complexity of the options available for shooting means that it takes time to get used to using.  It can also be intimidating for participatns to get going.
Conclusions
Higher end kit can have a place in participatory film-making and opens doors for creativity and finer control of outcomes.  It forces more planning and thinking through how things are going to look, but this pays off in the edit. A nice progression was getting participants interested in thinking about film-making and expressing their own ideas with the tablet based kit, and then working together as a group using this gear.  In the end a lot comes out of the particular interests of the participants themselves.

Wednesday 4 March 2015

ipads and accessories

In our pilot project in Malawi, we've been quite interested to see what mobiles and tablets give in terms of workflow, in field conditions.  Rick Goldsmith of Catcher Media has been using ipads in workshops for some time now, and he's built up a nice set of accessories that bridge the gap between a handheld ipad and something a group can work with and hope to get good sound.  This kit was based on what he's learned so far.


The basic kit, consists of:
  • iPad
  • A USB mic
  • Cables: lightning-USB converter, USB cable, USB extension
  • A Joy Factory Unite tripod mount
  • Lightweight tripod
  • Headphones
  • Boom pole.
Apps on the ipads:
  • iMovie
  • Pinnacle Studio
  • Videon

The mic allows for direct monitoring with headphones, and can be mounted on a boom pole for 2 person operation. This gives a lot of flexibility as one can move from a handheld solo ipad to a set up that works reasonably well for interviews.  We didn't buy a specific tripod and boom pole for this project, but the lightweight one here is fine (from my DSLR travel kit).  A lighter boom pole would have been quite feasible, and would have given a nicely portable overall weight of kit.  An alternative to the tripod and tripod mount would be some kind of clamp, which would again cut down on weight and size by replacing the tripod with door frames, chairs or whatever else offers a stable edge to clamp on to.

In terms of apps, we have a number loaded on, but these three are the key ones we've used so far. iMovie is very intuitive, but the Pinnacle app adds a few more features (separating out sound tracks, for example) which give a little more scope without being hard to use.  Videon offers more creative control and even some simple editing facilities like splitting clips and colour correction.


The advantages:
  • Ease of use - shooting and editing both take very little time to introduce, even with a group who're not really familiar with technology interfaces and controls.  We were really struck on this project with how quickly participants took to editing.
  • Can monitor sound (the mic has a headphone socket) and image (the screen is a nice size to see the shots).
  • Can shoot, edit and review on the same device.  It can also play out to a projector, or files can be shared between ipads or transferred to laptops for further editing (more on this separately).
  • There was a lot of interest in the ipads from participants, and request to have extra time playing with them, which we regard as a very healthy sign.
  • They work for small group work (3-4) people.  We've used them for interview practice and small two shot dramas. These play to the strengths of the device without making difficulties 
Issues we've run into
  • The lightning to USB connection comes loose a little too easily for comfort.
  • Reflections obscuring the image on screen while filming outdoors
  • The clamp can be a bit fiddly to fit on the the ipad so as to leave the lightning port free.  Rick had to drill a hole in it to be able to use an ipad mini camera as otherwise this would be covered over.
  • The controls in the basic camera app are quite primitive, and it 's very easy to get mixed up between shooting modes and record photos rather than video clips (for example).
Overall we think there's a lot to be said for this set up for building up skills.  It's not quite as satisfying for group work or for introducing video controls as camcorder based setups, but that might just be the way we're used to working.

Tuesday 3 March 2015

What this blog is for

I'm setting up this blog to share information about equipment between PV practitioners.  The initial impetus is a pilot study in Malawi where one of the things we're doing is evaluating different kinds of equipment in field conditions. We 're blogging the project at http://differentkindofteacher.blogspot.com/ but I thought it would be good to put the kit reports up separately and start to invite others to contribute to.  The idea is to have short, manageable reports ad reviews on the equipment we use for participatory video and how it turns out in practice.